
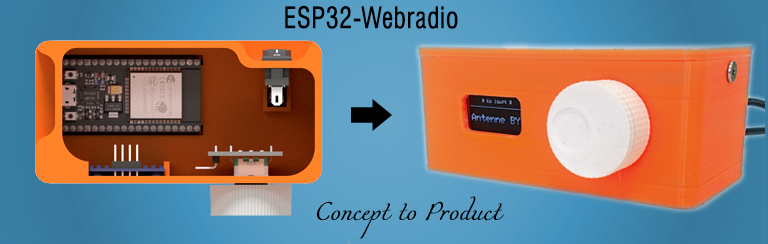
Summary
Listening to the radio via frequency modulation (FM) has its pitfalls. Not all stations of choice can always be received, and these are also locally limited. Noise-free analog reception is also not always guaranteed and sometimes significantly limits the playback quality. Using an ESP32 microcontroller, a 128×64 OLED display and an encoder, a simple web radio was built that can be programmed wirelessly and is suitable for connection to an audio amplifier.
Introduction
In addition to classic frequency modulation (FM), there are now several options for linear radio reception. In addition to the latest invention of digital radios, which promise perfect audio playback without annoying noise and local station limitations, most radio stations offer web streams that can be played on a variety of end devices if an Internet connection is available. Similar to analog audio reception, digital radios can also suffer from dead spots, which means that even the latest technology cannot provide listening pleasure.
In this case, the web radio is suitable as a reliable fallback level. Due to buffering, the stream is generally not played back in real time, but can lag a few seconds to minutes behind. For those for whom this is not a problem, the playback of audio streams is an ideal alternative if both analog and digital radio fail.
In this article, an Internet radio was designed on the basis of an ESP32 microcontroller and built using a 3D printed housing. Any online streams from radio stations can be integrated. Programming is straightforward via a web interface and Wi-Fi connection to the module.
Materials & Methods
All housing parts were printed with PLA filament on a 3D printer, other materials are also possible. Crimped Dupont connectors with a diameter of 2.64 mm (also known as “Arduino cables”) were used as plug connections. The source code was initially flashed to the microprocessor via the micro USB interface. The project was inspired by the blog entry on AZ-Delivery.
Components
- ESP32 developer board (not soldered!)
- Encoder KY-040
- Hollow plug socket 5.5×2.1
- OLED display 128×64 (SSD_1306)
- Jack Socket PJ320A
- Switch KCD11
- Power supply unit 5 VDC 2000 mAh
- M3 nuts (3 pieces)
- M3x8 countersunk screws (3 pieces)
- Resistor 10 kOhm (1 piece)
- Capacitor
Circuit diagram

Software
- Autodesk Inventor Professional 2023 (Build: 158, Release: 2023 (03/07/2022))
- Fritzing beta (Ver. 0.9.4 )
- Arduino IDE 1.8.13 (Board: ESP32 Dev Module, Upload Speed: 115200, CPU Frequency: 240 Mhz, Flash Frequency: 80 Mhz, Flash Mode: QIO, Flash Size: 4 MB (32 Mb), Partition Scheme: Default 4 MB with spiffs, Core Debug Level: None, PSRAM: Disabled)
Board management
Esp32 by Espressif Systems – Version 2.0.9
Library management
It is absolutely necessary to use the versions of the libraries specified here.
- ESP8266audio – Version 1.9.7
- LiquidCrystal_I2C.h – Version 1.1.2
- AiEsp32RotaryEncoder.h – Version 1.4.0
- AsyncTCP – Version 1.1.1
- Adafruit SSD1306 – Version 2.5.7
- Adafruit GFX Library – Version 1.11.5
- Adafruit BusIo – Version 1.14.1
- ESPAsyncWebServer – Version 2.10.8
Sketches
- audio.ino – streaming and decoding audio data
- lcdisplay.ino – show station data an LCD
- rotary.ino – initialize and handle choosing senders
- senderlist.ino – senderlist by flash-values – or, if not present, by defaults
- senderconfig.ino – asynchronus webinterface to store sendernames und -urls
- senderconf.h – html-template for above
- wlanconfig.ino – seperate program to get WLAN-config per webinterface
- wlanconf.h – html-template for above
Code
#include <Preferences.h>

//structure for stationlist
typedef struct {
  char url[100];  //stream url
  char name[100]; //stations name
} Station;

#define STATIONS 13 //number of available stations

//station list (stations can now be modified by webinterface)
Station stationlist[STATIONS];

//instances of prefernces
Preferences pref;
Preferences sender;

//global variables
uint8_t curStation = 0;   //index for current selected station in stationlist
uint8_t actStation = 0;   //index for current station in station list used for streaming
uint32_t lastchange = 0;  //time of last selection change
char title[64];
bool newTitle = false;

//setup
void setup()
{
  Serial.begin(115200);
  delay(1000);

  // -------------------
  setup_senderList();
  setup_audio();
  setup_rotary();
  setup_lcdisplay();
  //init WiFi
  Serial.println("Connecting to WiFi");
  while (!makeWLAN())
  {
    Serial.println("Cannot connect :(");
    delay(1000);
  }
  Serial.println("Connected");
  setup_senderConfig();
  // -------------------

  //set current station to 0
  curStation = 0;
  //start preferences instance
   pref.begin("radio", false);
  //set current station to saved value if available
  if (pref.isKey("station")) curStation = pref.getUShort("station");
  //set active station to current station
  actStation = curStation;
  //show on display and start streaming
  showStation();
  startUrl();

}

// main loop
void loop() {
  if (newTitle==true)
  {
    stopscrolling();
    displayTitle();
    newTitle = false;
  }
  //check if stream has ended normally not on ICY streams
  if (!loop_audio())
  {
    Serial.printf("MP3 done\n");

    // Restart ESP when streaming is done or errored
    delay(10000);

    ESP.restart();
  }
  //read events from rotary encoder
  rotary_loop();

}
Results
Hardware
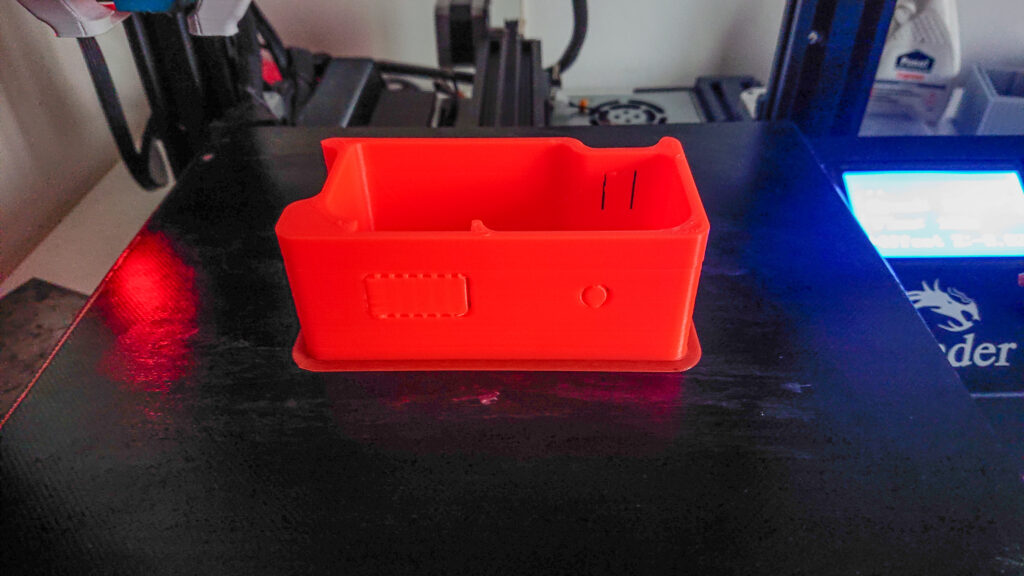
The CAD-designed concept was 3D-printed and wired according to the circuit diagram. The shaft of the encoder had to be shortened to attach the flat rotary pushbutton wheel. By using a standard button or a deeper control element, this step is no longer necessary. The display and the 3.5 mm jack socket were attached with hot glue. The cover was attached with M3 countersunk screws.
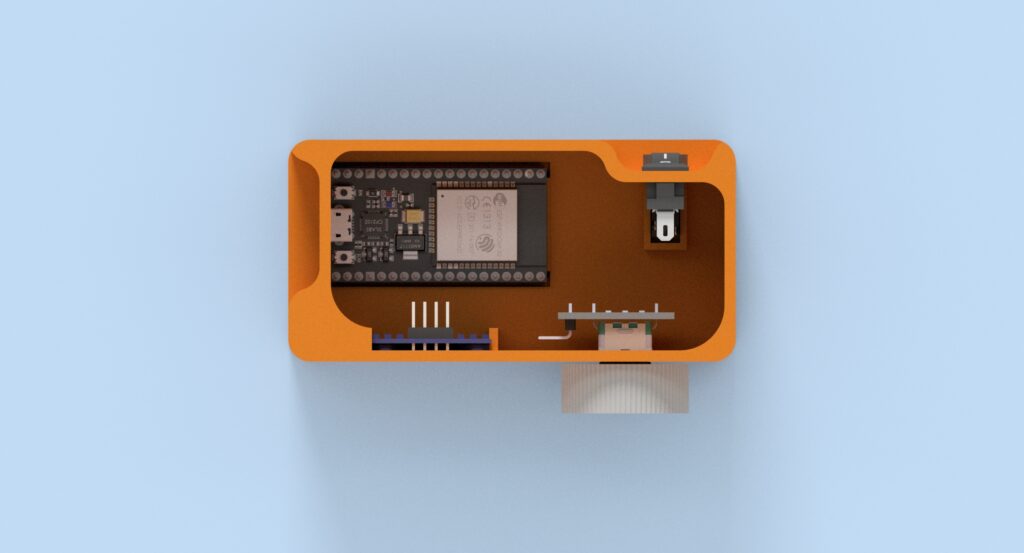

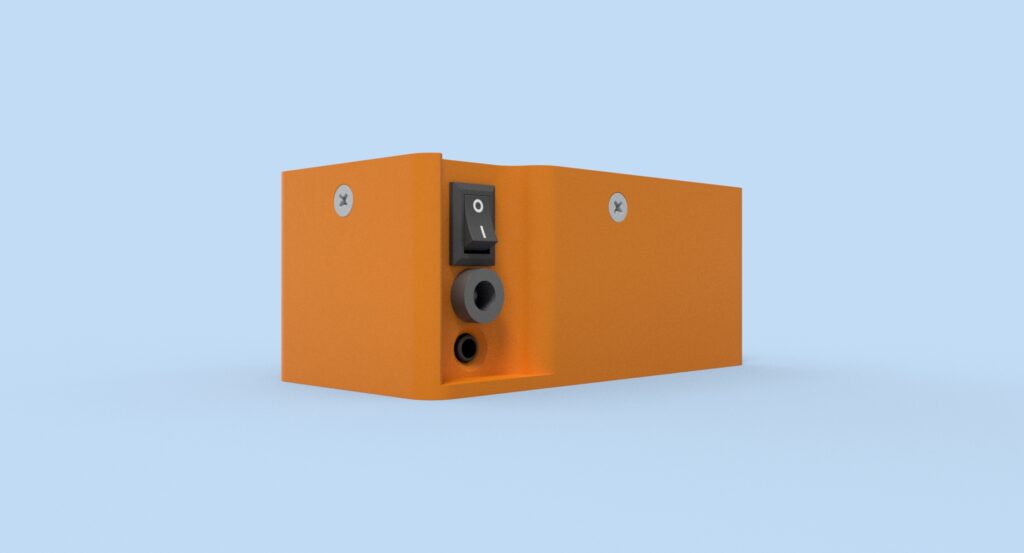
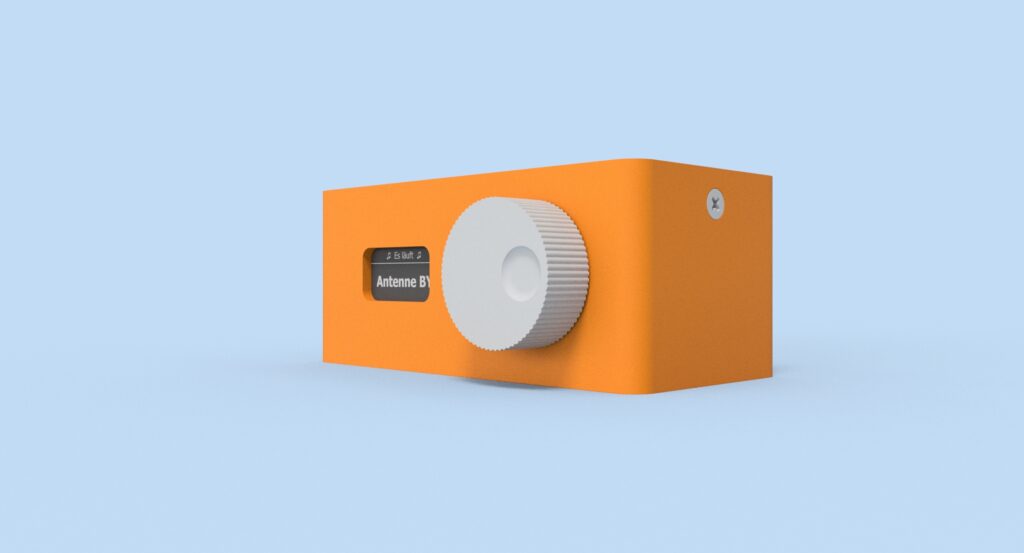
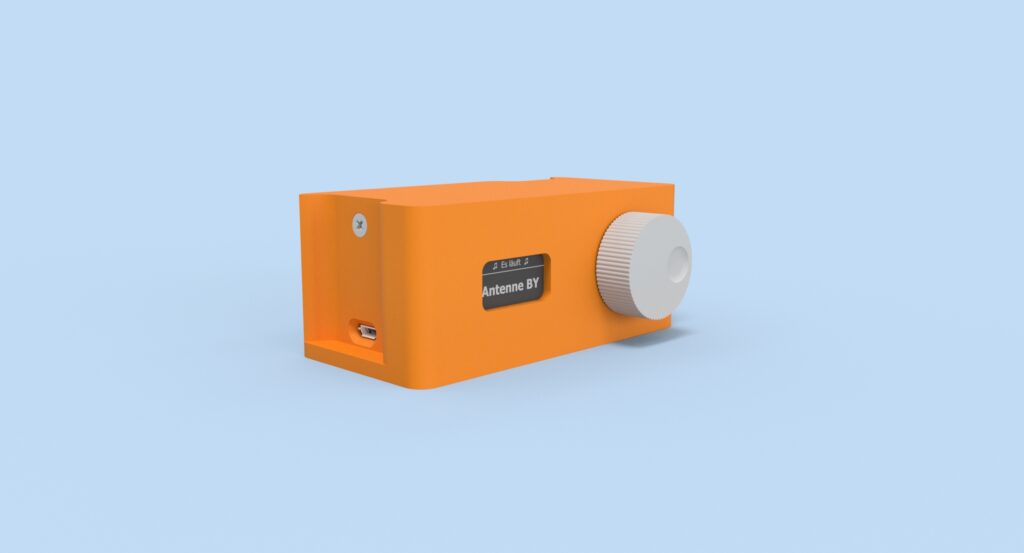
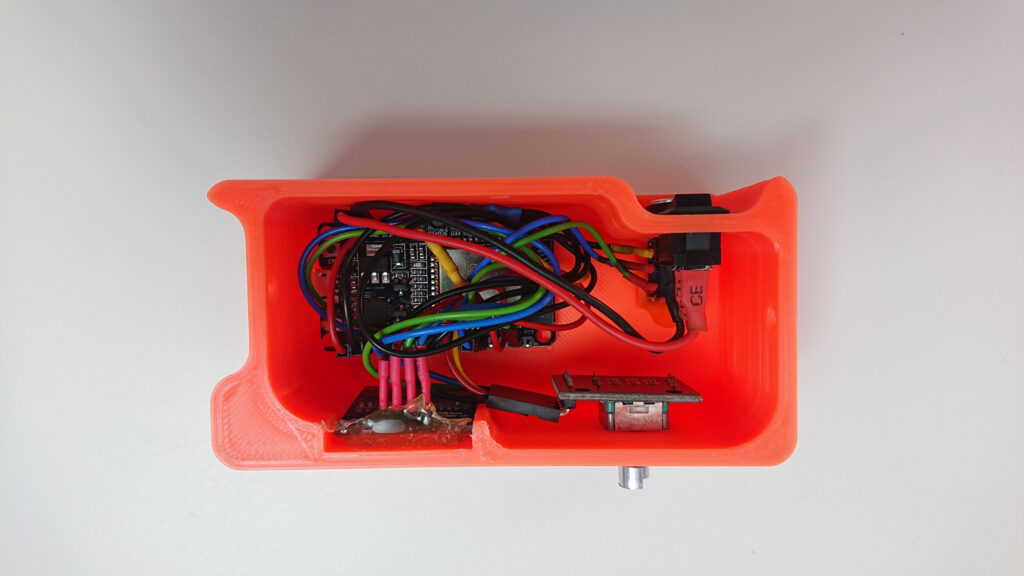
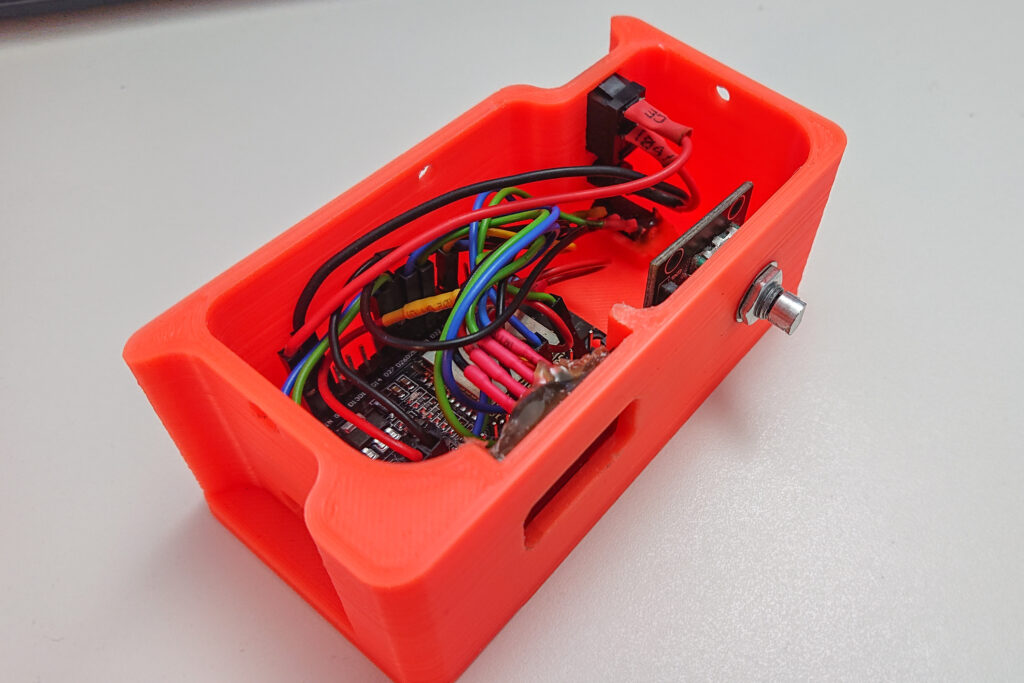
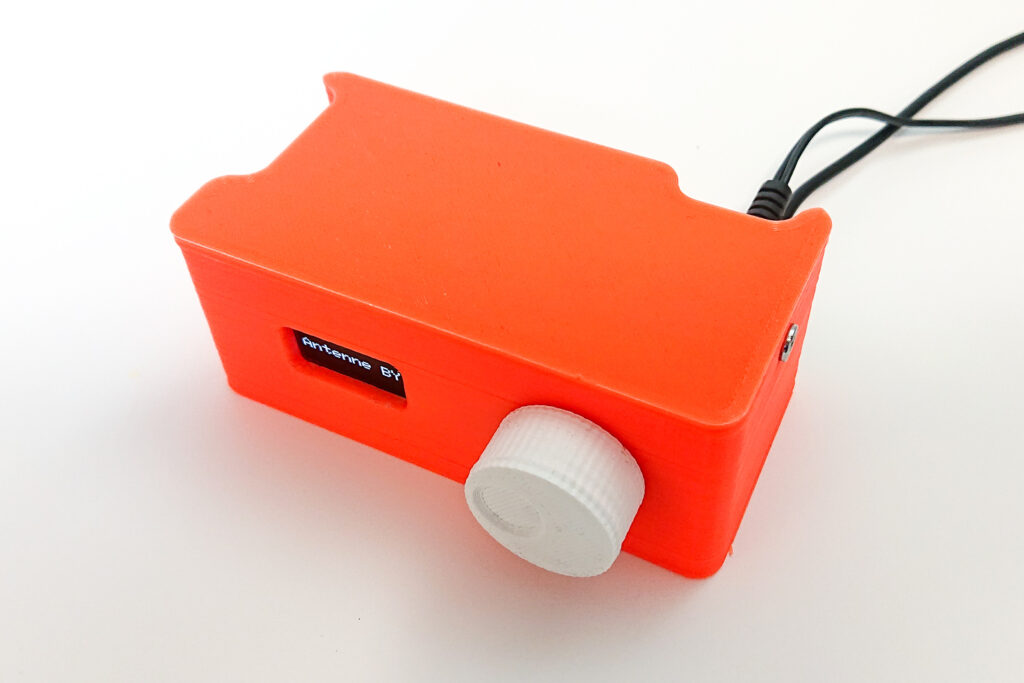
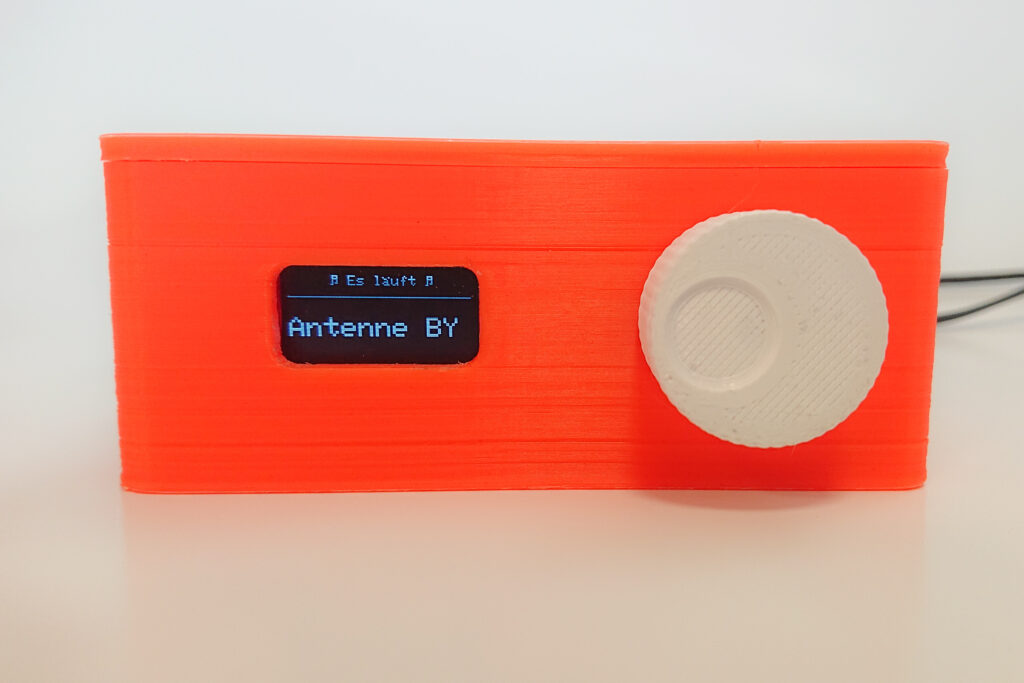

The combination of the jack socket and barrel connector for the power supply on the back of the device proves to be an optimal solution. The accessible USB port to the ESP32 module allows code adjustments without having to open the module. The rotary push wheel of the encoder allows user-friendly operation of the module. The 128×64 OLED display fits perfectly into the concept and works without any problems. The web radio is ideal for connecting directly to an amplifier. There is no built in audio amplifier.
Software
When the radio is switched on for the first time, the display instructs you to connect to the radio via Wi-Fi and enter the Wi-Fi settings. The radio is then connected to the network.
If the user turns the encoder, the header in the OLED display changes from “Listening to” to “Change station”. The name of the next station is shown in the center of the display and can be accepted by pressing the encoder. If no user input is made for 5 seconds in station change mode, this is canceled and the content of the header changes back to “Listening to:”.
The title of the current song is not currently shown in the display. The problem here is that there is an audible crackling sound as soon as the text is updated. We recommend deactivating the text change function. Instead, the current IP address of the radio in the network is displayed. Stations can be added and removed by entering this address in the browser. here are currently 13 transmitter slots available (the number can be adjusted as required in the sketch). These can be overwritten via the web interface.


Outlook
It will not be possible to significantly reduce the delayed switch-on time due to technical circumstances. A solution for suppressing the annoying crackling when changing text could only be achieved by deactivating the function. All desired streams could be played back without noise and changing the radio preset via the web interface worked smoothly. The Wi-Fi connection is constant.
The power supply is much more reliable via the USB port than via the mains adapter. We therefore recommend installing a capacitor in front of the ESP if you want to operate it with a switch and hollow plug.
Hello, Great project. I am currently working on it. Please tell me how to upload software to esp. Should I open all sketches? Which sketch is the main program? I have experience in uploading programu to esp od arduino but it was always one file with the program.
Hi Chris,
you open ESPwebRadio.ino. The other sketches must be in the same folder. Then you can compile and upload as you are already used to. You will probably have to add libraries.
Best
Peter
Thank you for the wonderful project, I really enjoyed it! I have an ESP32-WROOM-32 platform with a built-in 0.96-inch monochrome OLED display (SSD1306). The resistor indicated on the schematic is essential, otherwise the sound will be intermittent. The controls are easy to use, and the display displays all the information beautifully. The firmware uploaded successfully, although there was a warning about the display library having to be run from a shared directory. I ignored it, though. Ultimately, my OLED display (SSD1306) works well. I highly recommend this project. Best regards, Vasily.